Cloud Configuration Guide
Contents
Introduction
The "Anonymized Project Sync for Jira Cloud" application helps you synchronize two or more Jira projects and anonymize users of other companies.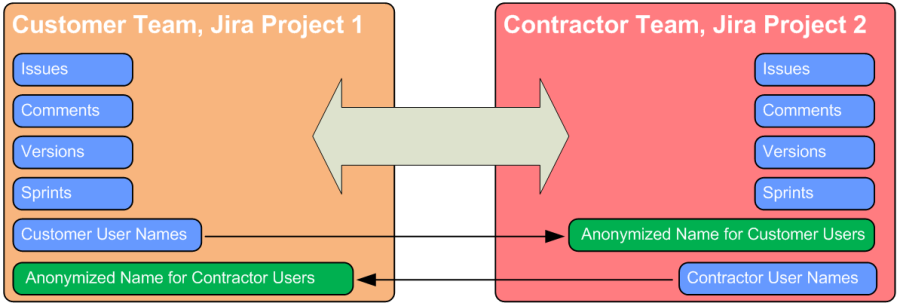
The synchronization works as follows:
- Synchronized projects have the same issues, sprints, versions, etc.
- Each issue has a linked sync issue in the Anonymized Project Sync group on the issue page
- Names of other company users are anonymized in all project views
Features
The application features are as follows:
- Synchronizing issues, versions, and components in two or more Jira projects automatically in real time
- User-friendly setup for synchronizing several projects
- Using predetermined rules for synchronization
- Compliance with the Fremdarbeitskräfte (FAK), a Germany standard for working with contractors
- Anonymization by replacing real names with configured company names
- Easy assignment of Real-User to a Company-User
- Using Jira in full functionality, despite anonymization
- Easy non-personal communication between companies
Supported Jira Fields
The following fields are successfully synchronized using the application:
- Jira Core system fields
- Jira Software fields, including Ranking and Sprint
- Jira standard custom fields
- Jira third-party custom fields are typically supported. If you experience issues or require a support of a specific third-party plugin, please raise a Request Ticket.
Known Issues and Limitations
The application has the following known issues and limitations, which are caused by specifics of using the Jira Cloud software.
Missing functionality:
- Cannot change Epic linking in next gen projects, see https://jira.atlassian.com/browse/JSWCLOUD-17317
- Cannot change Parent and convert Task to Sub-task and vice versa. For more information, see https://jira.atlassian.com/browse/JRACLOUD-70305
- Cannot change Service Desk Request Type. For more information, see https://jira.atlassian.com/browse/JSDCLOUD-4609
- Multi-user fields currently are not supported, see https://jira.atlassian.com/browse/JRACLOUD-72000
- Impossible to sync comment edits in the Service Desk projects, see https://jira.atlassian.com/browse/JSDCLOUD-7997
Known limitations:
- The Component values sync nightly
- Internal fields (created, updated) are not editable. During the initial sync and creating linked issues, these fields in the linked issues will contain the current time.
- Sync event limit is 10,000 events for a single operation, such as an initial sync. Events above this threshold will not be synchronized. (Note that an issue change can fire several events.) This is a high threshold, which is not likely to be exceed. However, the application can be configured on demand, as appropriate
Synchronization and Anonymization Examples
Synchronized boards: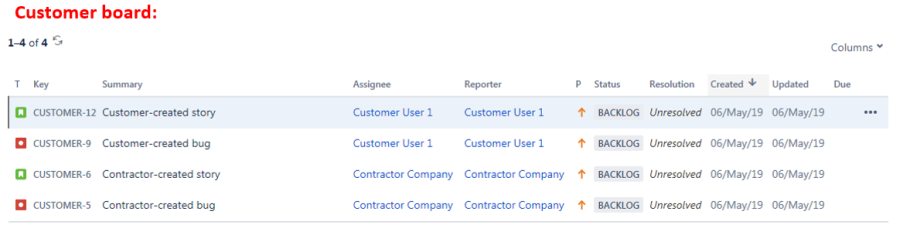
Customer-created issue in the Customer's project: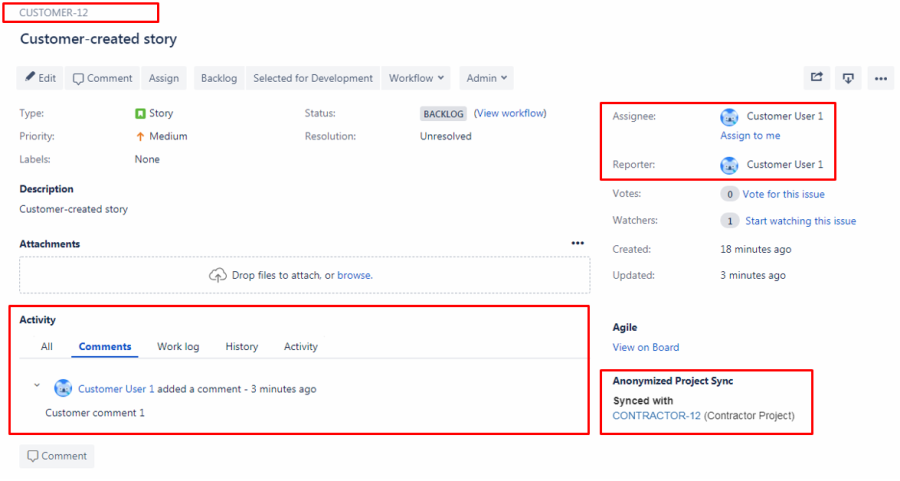
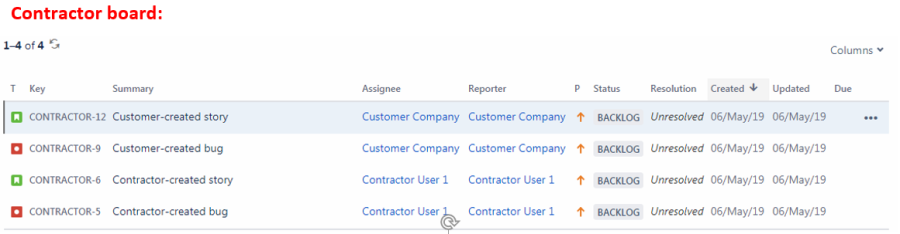
Customer-created issue in the Contractor's project: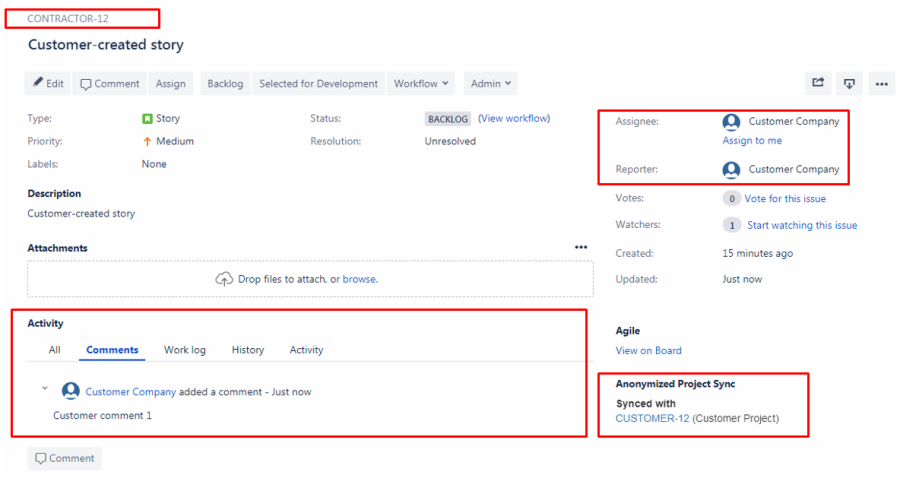
Anonymizing a user that is not mapped to any of the companies in the configuration: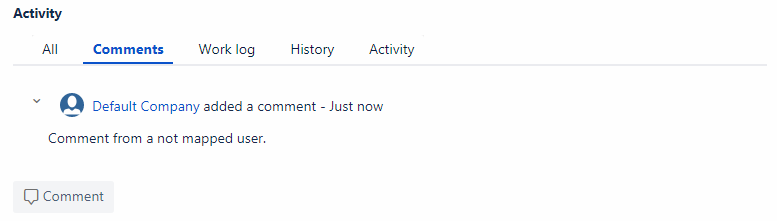
History log:
Activity log: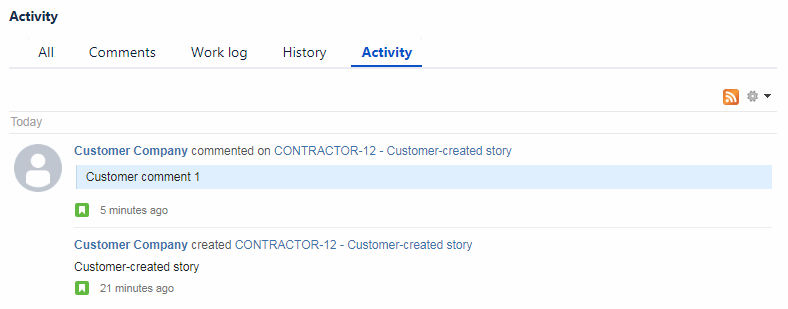
Configuring Jira Projects
For synchronization, customer and contractor companies must work in different Jira projects. Customer and contractor users will work separately in their associated Jira projects, and project updates will be synced to other projects.
The synced projects must have the same set of issue types, workflows, and screens. The common configuration schemes are recommended. The synchronization might fail because of missing components, such as an issue type or workflow status.
Use the existing projects for a customer and contractors, or create new projects. When using the existing projects, do the initial synchronization for the projects before enabling the real-time synchronization.
Project configuration examples:
- Use separate projects for all companies.
- Use two projects: one project for the customer company, and one project for all contractor companies.
Configuring Users
Before configuring project synchronization, you must add and configure Jira users.
Creating Users for Companies
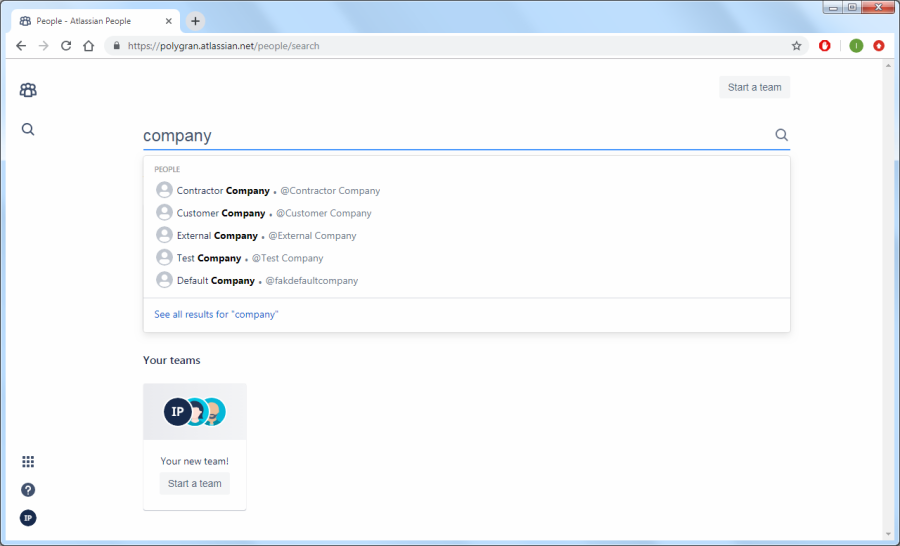
Company user names are shown instead of original user names when changes are synced to other projects.
Create a company user for each company that works in the synced Jira projects. For company name anonymization, use made-up names.
- Create an email for a company user.
- Invite the company user to Jira Cloud.
- Accept the invitation to Jira Cloud from the company user.
- Repeat the same steps for all companies.
- Check that company users appear in the list of users.
TIP: You can have one or more company users for a company. For example, use several users when you need to distinguish contractor company offices, such ContractorLondon or ContractorParis.
Creating a User for the Default Company
The Default Company is used for users that are not assigned to any of the companies in the user configuration (see Assigning Users to Companies). The Default Company user is shown instead of these users when changes are synced to other projects.
For example, non-assigned users may be Administrators or not yet assigned users.
Create a user for the Default Company using instruction in section Creating Users for Companies.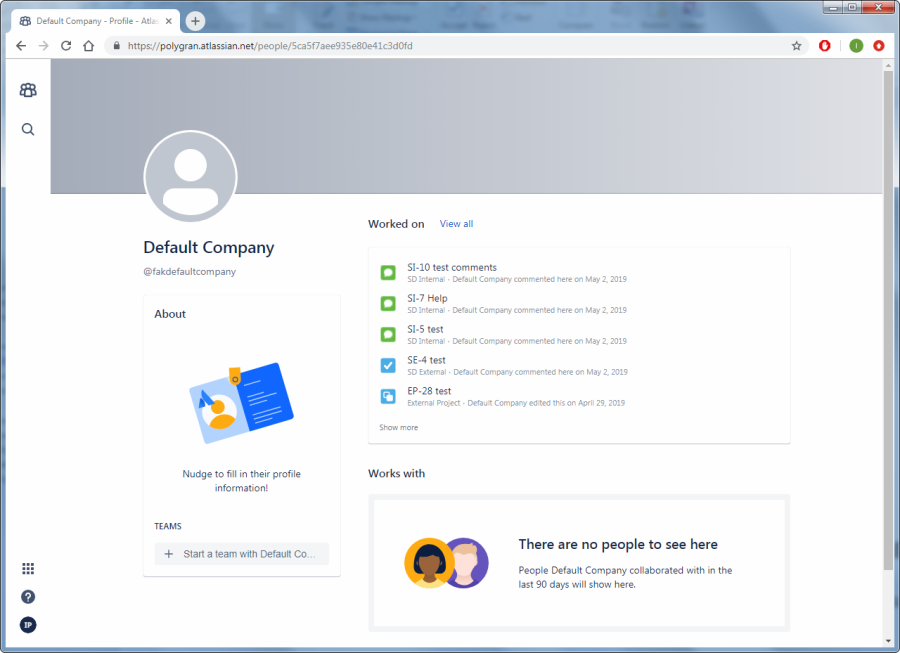
Granting Administrator Permissions to Company Users
In all synced projects, grant administrator permissions to all company users. This is required to perform synchronization operations. We recommend to add company users to the Administrators project role.
NOTE: Granting Administrator permissions to the company users does not raise security issues because no real users work from company users.
- Navigate to the "People" display for a synced project.
To access this page, click Project Settings > People.
- Click "Add people".
- In the Users field, add company users.
- In the Role field, select the Administrators role.
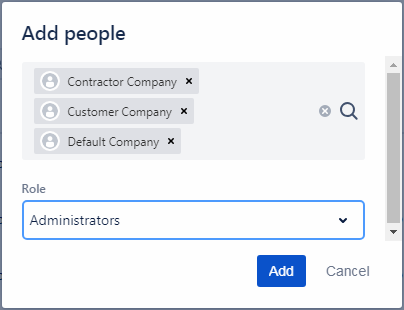
- Click Add.
- The specified users appear in the user list.

- Repeat the same steps for all synced projects.
Configuring the Anonymization Application
We assume that you already have the Anonymized Project Sync for Jira Cloud application installed. Otherwise, install the application from https://marketplace.atlassian.com/apps/1219392/anonymized-project-sync-for-jira?hosting=cloud&tab=overview
Specifying Company Users
Specify company users for companies that work in the synced projects.
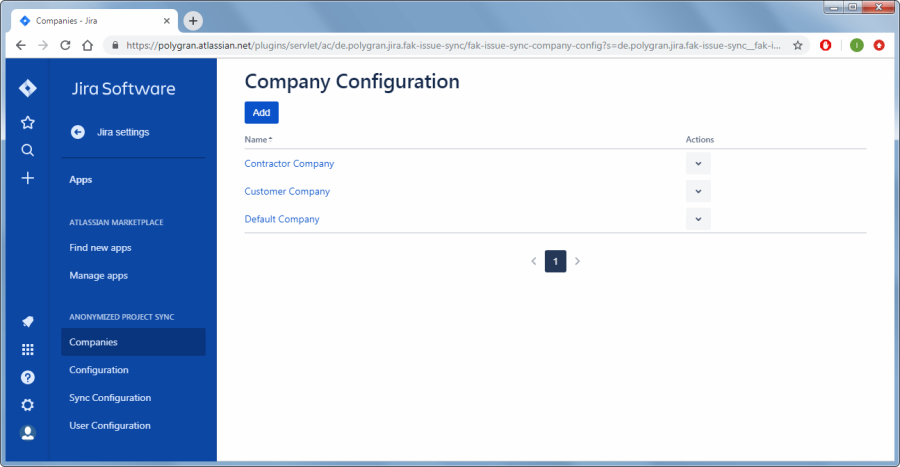
- Navigate to the "Anonymized Project Sync for Jira" application's Companies page.
To access this page, click Jira Software > Jira Settings > Apps > ANONYMIZED PROJECT SYNC > Companies
- Add company users for all companies intended for synchronization with anonymization.
- Add the default company. For more information about the default company, see Specifying the Default Company.
Specifying the Default Company
All users that are not assigned to any of the companies in the User Configuration page (see Assigning Users to Companies) will be assigned to the default company and anonymized using the default company's name. For example, non-assigned users may be Administrators or not yet assigned users.
Specify the default company as follows:
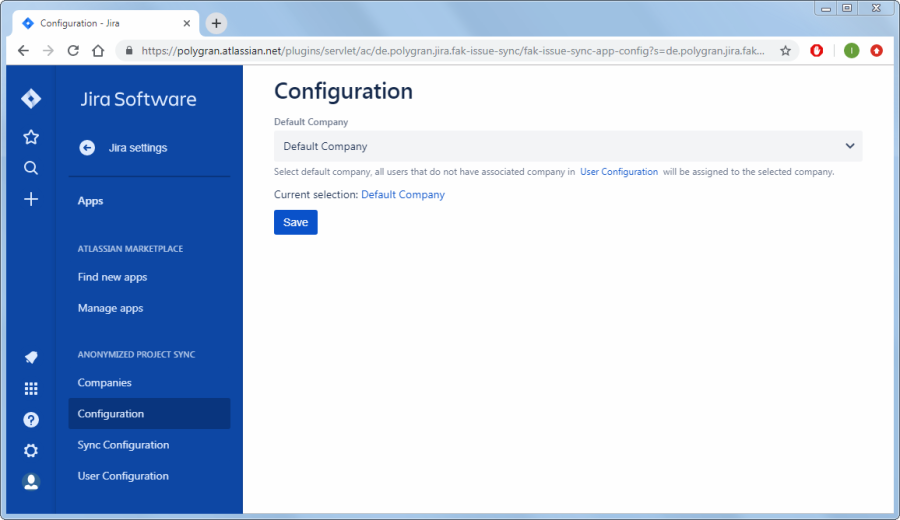
- Navigate to the "Anonymized Project Sync for Jira" application's Configuration page.
To access this page, click Jira Software > Jira Settings > Apps > ANONYMIZED PROJECT SYNC > Configuration
- Specify the default anonymization company.
- Click Save.
Assigning Users to Companies
Assign all users that work in the synchronized Jira projects to their associated companies. When synced to other projects, company names will be shown instead of user names. For users that are not assigned to any of the companies, the default company name will be shown.
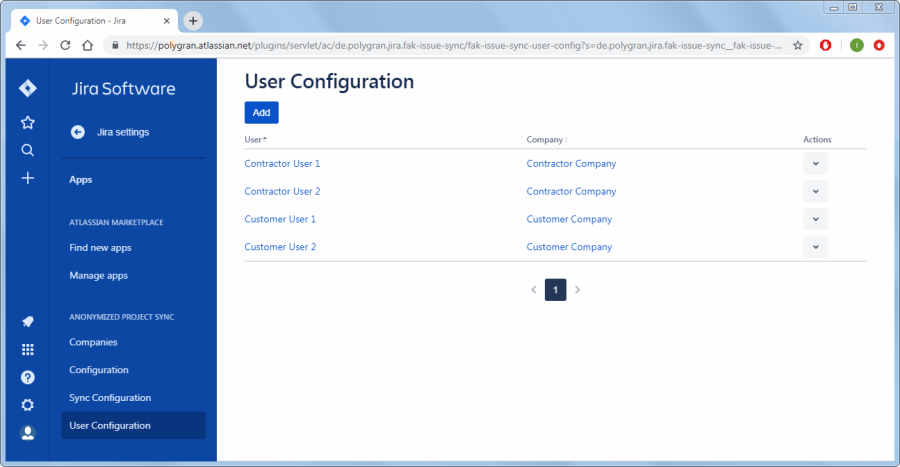
- Navigate to the "Anonymized Project Sync for Jira" application's User Configuration page.
To access this page, click Jira Software > Jira Settings > Apps > ANONYMIZED PROJECT SYNC > User Configuration
- Click "Add" to assign a user to a company.
- Select users in the "User Names" field.
- Select a company in the "Company" field.
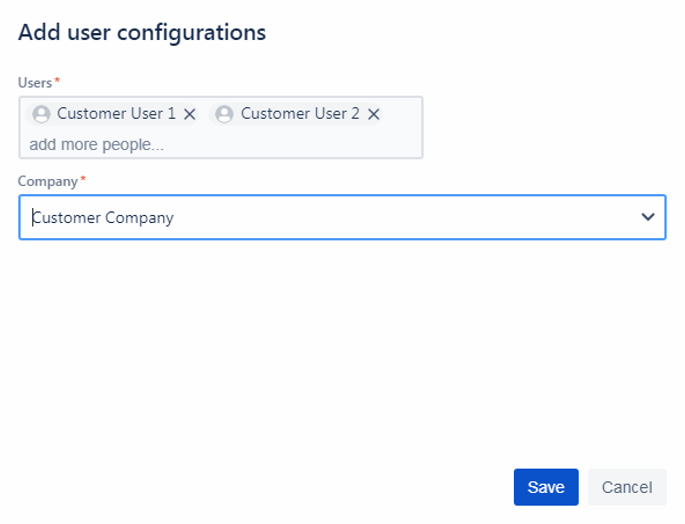
- Click "Save" to assign users to a company.
Creating a Synchronization Configuration
- Navigate to the "Anonymized Project Sync for Jira" application's Sync Configuration page.
To access this page, click Jira Software > Jira Settings > Apps > ANONYMIZED PROJECT SYNC > Sync Configuration
- Click "Add" to create the synchronization.
The "Add sync configuration" display opens.
- In the "Name" field, enter the synchronization configuration name.
- In the "Projects" field, select Jira projects to synchronize.
A project can participate in one synchronization configuration only.
- Select project components that must not be deleted during the synchronization after users delete these components (for example, issues) in other synced projects.
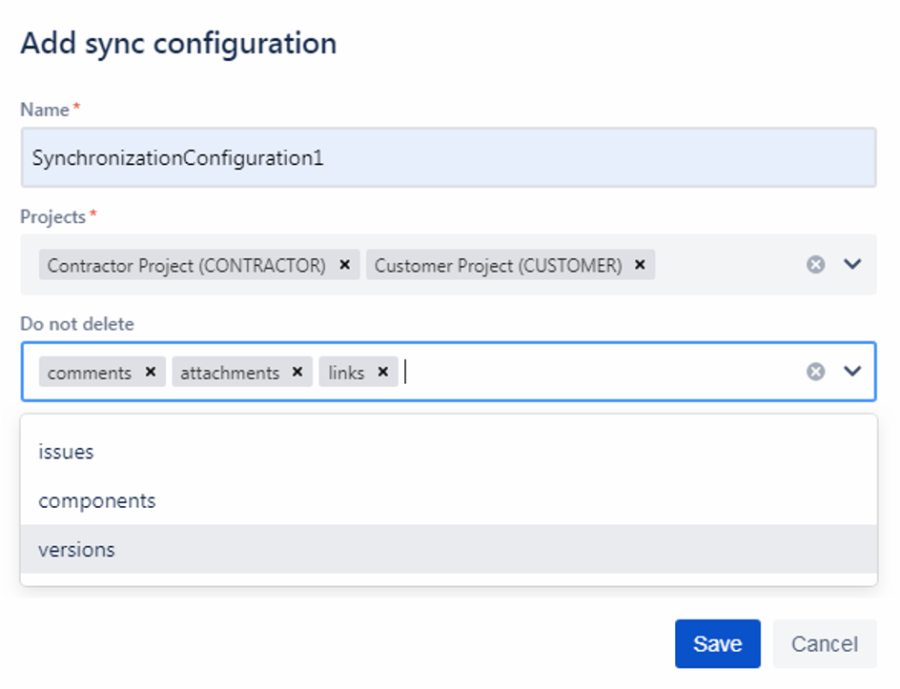
- Click "Save".
The synchronization configuration appears on the "Sync Configuration" display. By default, the synchronization is disabled.
Synchronizing Pre-Existing Project Contents
NOTE: To perform the initial synchronization for Jira projects, your Jira must be already preconfigured, as described in section Configuring Jira Projects.
You may need to synchronize project contents that existed before enabling the synchronization.
- Navigate to the "Anonymized Project Sync for Jira" application's Sync Configuration page.
To access this page, click Jira Software > Jira Settings > Apps > ANONYMIZED PROJECT SYNC > Sync Configuration
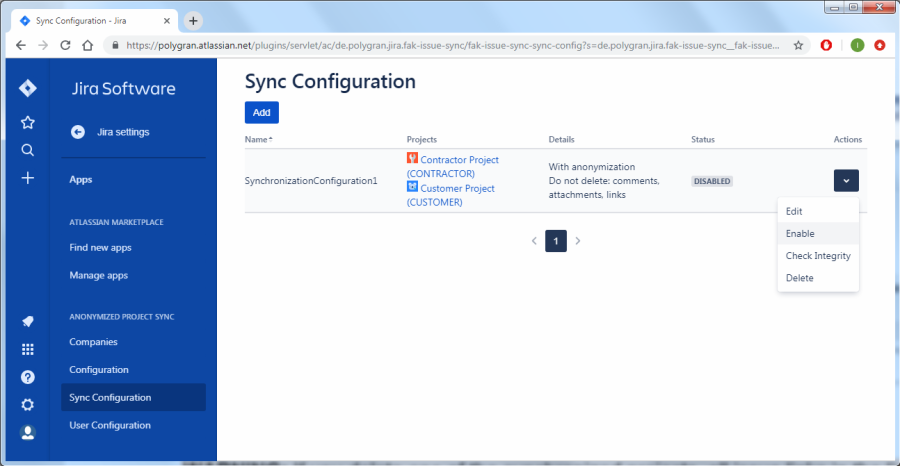
- Click "Actions" for a synchronization configuration, and select "Check Integrity".
The synchronization of project contents starts. The application copies not synced contents from a project to the linked projects until each project contains all issues from the linked projects.
WARNING: Until the initial synchronization is completed, do not work in the synchronized projects to avoid data inconsistencies.
After a successful integrity check, the projects are synced and user names are anonymized. After an initial synchronization, enable the real-time synchronization as described in section Enabling Project Synchronization.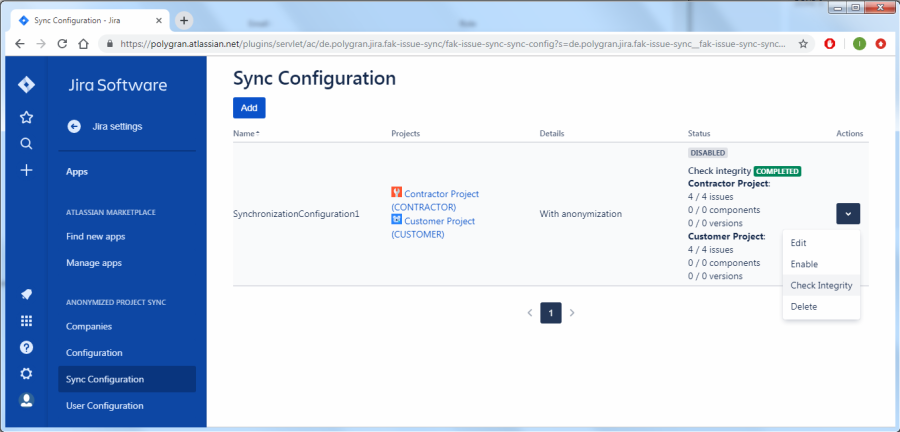
Enabling the Real-Time Project Synchronization
NOTE: To perform the real-time synchronization for Jira projects, your Jira must be already preconfigured, as described in section Configuring Jira Projects.
- Navigate to the "Anonymized Project Sync for Jira" application's Sync Configuration page.
To access this page, click Jira Software > Jira Settings > Apps > ANONYMIZED PROJECT SYNC > Sync Configuration
- Click "Actions" for a synchronization configuration, and select "Enable".
The synchronization for all further project updates in now enabled.
WARNING: If you delete a synchronization configuration, links to the associated issues in the synchronized projects will be deleted. The other project and issue data will not be affected. However, you will not be able to restore the synchronization linking.